Wednesday 30 November 2011

Turkey Curry

There hasn't been a new recipe on the blog for a little while now, due to being swamped with schoolwork last week! Poor Adam didn't get a single home cooked meal for the entire week. I tried to make it up to him yesterday, by putting this curry in the slow cooker, so it would be ready and waiting for him as soon as he got home from work!

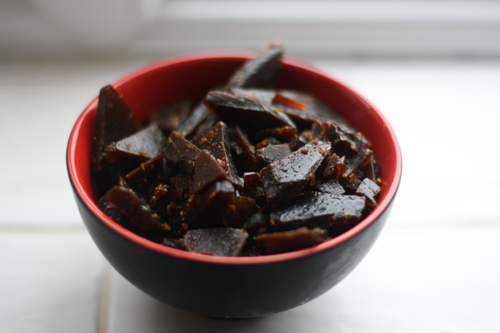
Turns out trying to make a curry look photogenic is quite difficult - for me at least! 

low syn

Turkey Curry

Based on this curry.

Ingredients:

600g turkey breast, cut into bite sized pieces (you can use an equal amount of any meat or veggies you'd like)
500ml passatta
200ml light coconut milk
2 onions, finely chopped
4 garlic cloves
1 tsp turmeric
1 ½ tsp cumin seeds
1 tbsp dried coriander
1 tbsp cayenne pepper (warning: this curry is very spicy. If you don't like it as hot then take this down to ½ tbsp or 1 tsp, adjust to taste. Remember it's easier to make something more spicy than it is to make something less spicy!)
3 green cardamom pods
Black pepper

Method:

1. Finely chop onions, place in a saucepan sprayed with frylight (or other non stick spray) and cook slowly over a very low heat. Add a small splash of water if they seem like they are starting to stick, and stir often.
2. Add garlic cloves and passatta, and simmer for five minutes
3. Optional: Adam hates lumps of onion in his sauces so I always do this step, but you don't have to. I transferred the sauce into a blender, and carefully (it's hot!) blended.
4. Add turkey to slow cooker, season well with black pepper and pour sauce over.
5. Add spices and coconut milk and stir to combine
6. Leave in slow cooker for about four hours. Ensure turkey is cooked through before serving with rice.


Serves 4.
Syns: 2.5 per serving

Friday 25 November 2011

The finished product!

My dried apple rings are ready!

Photobucket

I made these for a Christmas hamper that is to be raffled off for work, so I tried to package them up nicely! I put them in a clean, sterilised jar then tied a square of fabric around the top with wool. I hope whoever wins the hamper enjoys them (I snuck one out to try and they're lovely)!

Tuesday 22 November 2011

My favourite fruit


So happy to see these in the shops and markets, a true sign of autumn and one of my favourite fruits. Makes me so incredibly excited for Christmas!

Friday 18 November 2011

A Bonfire Night Repeat

It's Friday!! I'm so excited for the weekend this week, more so than normal! Adam and I have finally got a full weekend off together, which is a rarity. On Saturday we're going to go wedding ring and log fire shopping, then off to watch the new Twilight film! And on Sunday we'll have a long walk with Izzy, followed by a drink in the pub and a delicious Sunday dinner as I have a new recipe that I'm itching to try. I can't wait!

I just thought I'd take some time now to share a few photos from last weekend. The week before had been Bonfire night but Adam's nephews couldn't come to our little bonfire party as they were on their holidays, so we had a repeat last weekend too. There were less people, so I felt I was able to relax a little more and spend a bit more time taking photos things in!

bonfire night

bonfire

Everything was pretty much the same, apart from I had time to make some amaretto hot chocolate, which was absolutely divine!

hot chocolate

The photo with the half-full mug and marshmallow doesn't really do it justice, but I think I'll be making some more this weekend, so will take a nice photo and pop the recipe up next week hopefully!

I hope you enjoy your weekend too, let me know what you have planned!

Tuesday 15 November 2011

Dried Apple Rings

This time of year, apples are generally at their best. At work, we were recently given a massive bag of them. We let the kids do apple bobbing on Halloween, but as we're doing a hamper to raffle off at Christmas time, I said I would bring any apples that were left home to make something for the hamper with.

apple, recipes, preserving, dried apple rings, vegan, how to, fruit, healthy, natural

These are incredibly easy to make and require very little effort! You just have to keep a bit of an eye on them.

What you need:

4 apples
1 lemon or lime

Method:

Wash and core your apples, and remove any bruised bits.

apple, recipes, preserving, dried apple rings, vegan, how to, fruit, healthy, natural

Slice into rings about 3mm in width. They need to be fairly thin, and fairly uniform in size so they dry at an even rate. Put them in a bowl and squeeze over the juice of one lemon or lime, and toss to coat. The lemon/lime stops the apples from going really brown.

apple, recipes, preserving, dried apple rings, vegan, how to, fruit, healthy, natural

String the apple rings, and hang them up to dry. You need somewhere warm but that has a good airflow too. It's important to make sure the apple rings aren't touching.

apple, recipes, preserving, dried apple rings, vegan, fruit, healthy, natural,

I put my apple rings over the radiator vent in the kitchen - it's warm but a lot of air circulates as it's close to the back door. Leave them to dry for about a week or so, but remember to just keep an eye on them, make sure they don't slide together.

Friday 11 November 2011

Remembrance Day

Field of Poppies

Today is Remembrance Day. This year is especially poignant as someone that I used to be friends with was killed in Afghanistan on Wednesday. It's upsetting enough when you hear about the boys who lose their lives fighting for their countries, but when it's someone you know it's heartbreaking. My heart, thoughts and prayers are with his family today.

Thursday 10 November 2011

Peanut Brittle

Every Bonfire Night when I was younger, my parents would have a fireworks party, and my grandma always used to bring some peanut brittle, and it was my favourite thing about the day. This year I decided I would try to make some for my party! It wasn't quite as good as my Grandma's (is anything ever?!), but it was still good!


Ingredients:

50g soft brown sugar
400g granulated sugar
125ml water
½ teaspoon liquid gloucose
230g golden syrup
200g roasted peanuts (I bought the roasted, salted ones from the supermarket, and just rinsed the salt off and dried them. If you do this, make sure to dry them!)

Method:

1. Combine all the ingredients in a pan.
2. Line an A4 sized baking tray with greaseproof paper.
3. Bring ingredients to a boil, and boil until the mixture reaches 150 C/300 F, aka "hard-crack" stage. I don't use a thermometer, to check if the mixture is ready I drop a small amount into a cup of cold water. Test the mixture, and if it is brittle like toffee then it's ready. You can also read this guide for a better explanation!
4. Turn off the heat, add the peanuts to the pan, and tip into your prepared baking tray.
5. Leave to cool completely - the mixture will be VERY hot and don't attempt to pick the tray up for a while either as this will become hot too.
6. Once cool, smash up with a toffee hammer or rolling pin.
7. Keep in an airtight container - it will last for a couple of weeks

Now that Christmas and the holiday season is just around the corner, this would make an ideal homemade gift! Just put it in a pretty jar, and perhaps add a bow!

Monday 7 November 2011

Bonfire Toffee

Hello! How was your weekend? If you're reading from the UK, did you go to any bonfires this weekend?

In England, we celebrate Bonfire Night on the 5th November each year. We do it to remember that in 1605, Guy Fawkes plotted to blow up the houses of parliament but his plan was found out and stopped and so we all have bonfires and light fireworks.

Some people have firework displays at home, and others go to big organised bonfires. This year, as it was on a Saturday, Adam and I decided to have a little party ourselves. We had a bonfire because our garden is a bit of a mess at the moment, and we're having it landscaped next year, so we figured it wouldn't hurt to have a bonfire on the lawn!

We invited some family and friends over, and we lit fireworks, gathered by the bonfire:

Photobucket

Toasted marshmallows:

Photobucket

And ate. A lot. Pie and peas, parkin, and toffee!

bonfire toffee

Bonfire Toffee

Ingredients:

450g dark brown sugar
125ml water
½ teaspoon liquid gloucose
115g golden syrup
115g black treacle

Method:

1. Combine all the ingredients in a pan.
2. Line an A4 sized baking tray with greaseproof paper.
3. Bring ingredients to a boil, and boil until the mixture reaches 150 C/300 F, aka "hard-crack" stage. I don't use a thermometer, to check if the mixture is ready I drop a small amount into a cup of cold water. Test the mixture, and if it is brittle like toffee then it's ready. You can also read this guide for a better explanation!
4. Turn off the heat, and tip into your prepared baking tray.
5. Leave to cool completely - the mixture will be VERY hot and don't attempt to pick the tray up for a while either as this will become hot too.
6. Once cool, smash up with a toffee hammer or rolling pin.
7. Keep in an airtight container - it will last for a couple of weeks (if you can keep your hand out of the jar that is! The Classic Wink Smiley)

Later this week, I'll have another recipe for you - peanut brittle!

Friday 4 November 2011

Macaroni Cheese with Broccolli

I've never made macaroni cheese before. Well, actually, that's a lie. I've never made an edible macaroni cheese before! I tried to make one once but the recipe called for eggs, and then for it to be baked. Well, all the eggs curdled and it was just like eating watery pasta with scrambled eggs mixed in. Not very nice!

I've always wanted to try it though - I love pasta, and I love cheese. A match made in heaven! So earlier this week, I did in fact try it. I added lots of brocolli as well, for two reasons: I love brocolli cheese and I had a full head of brocolli that had seen better days.

macncheese

Macaroni Cheese with Brocolli

Ingredients:

  • 20g butter
  • 20g plain flour
  • 300ml semi skimmed milk
  • 200g mature cheddar cheese (I used low fat but it doesn't matter)
  • Half teaspoon English mustard
  • Half teaspoon cayenne pepper (optional)
  • Small head of brocolli
  • Pasta

    Method:

    1. Put pasta on to boil, grate cheese and seperate brocolli florets
    2. Melt butter, then add flour to form a roux
    3. Add mustard, cayenne pepper and the milk a little at a time. Keep stirring the mixture and don't add more milk until the previous amount has been absorbed
    4. About halfway through the pasta cooking, add the brocolli either to a steamer set over the pan, or directly into the pan with the pasta depending on how you prefer to cook your brocolli
    5. When all milk has been absorbed, add cheese and stir into sauce
    6. Drain pasta and brocolli well, and then add the cheese sauce
    7. Sprinkle over some extra cayenne pepper if you so desire
    8. Enjoy!

    I loved it every bit as much as I thought it was, and it only took about 20 minutes to make. It's not something I'll be having every day but will be delicious as an occasional comfort food - especially on these upcoming cold winter nights!

    I hope you have a lovely weekend - do you have anything special planned?
  • Tuesday 1 November 2011

    Spaghetti Bolognese

    spaghetti bolognese

    Ingredients

    1 onion
    3 small carrots
    3 garlic cloves
    500ml passata
    175ml red wine
    1 tsp oregano
    250g beef mince
    8 mushrooms
    Spaghetti pasta

    Method

  • Finely chop onion, garlic and carrots.
  • Lightly fry in olive oil or non stick cooking spray until onions are soft and translucent, taking care not to let the garlic burn.
  • Add passata and red wine, oregano, season to taste and let simmer for about ten minutes.
  • This next step is optional, depending on how you like your sauces. For me, Adam hates any lumps in his sauces, so this is where I add the sauce to the blender and blend for a minute or so to make it smooth. If you like lumps (like me!), then you can skip this step. If you do blend the sauce, take care as it will be hot.
  • In another pan, brown the mince.
  • Chop the mushrooms.
  • Add mushrooms and bolognese sauce to the mince and let simmer for about twenty minutes while you cook the spaghetti.
  • Serve hot and enjoy!

    Serves: 4
    Syns per serving: 1.5
  • LinkWithin

    Related Posts Plugin for WordPress, Blogger...